Tuesday, July 03, 2018

Kids Climbing Play Structure - Part 2

A few years ago I posted complete instructions on how to build your own kids climbing structure. At 6.5ft tall it was collapsible, portable, and featured both a rock wall and a cargo net. You can read the original post here.

However our situation has changed - our kids school has lost its playground while they undergo renovation, and we’ve added two additional kids to our brood, demanding a structure with a bit more flexibility.

To accomplish this, I cannibalized our climbing wall into a larger, more permanent structure. I didn’t keep detailed notes this time around, there was simply too much that went into it to provide the same level of instruction. But I hope these pictures provides some additional inspiration as to what you can transform your climbing wall into with a bit of time and a lot of hard work. Overall the additional structure cost me ~$1200 CDN in materials including the two slides which had to be ordered. The vinyl tent cover was custom made for $40 in material (and the labour to sew it was a gift).


Wednesday, December 06, 2017

Breaking the Chains of Analysis Paralysis - The Black Box (Part 1 of 7)

This is the first article in a series of 7 that I will be putting up in the coming weeks about Analysis Paralysis. The purpose of these articles is to highlight primary causes of AP among people who play games, and discuss strategies that you can apply as a designer to reduce the potential for AP.

Each article in this series will go into depth on one potential cause of AP, examples of situations where it can be problematic, and present some solutions that can improve the situation.

Although these articles are specific to Boardgames, the concepts of Analysis Paralysis apply widely to everyday life. These specific examples can easily be translated to apply to systems in general, including business systems and enterprise reporting & dashboards.
  1. The Black Box
  2. The Paradox of Choice – Dec 13
  3. The Prisoner’s Dilemma – Dec 20
  4. The Maze to Victory – Dec 27
  5. Relationship Status: It’s Complicated – Jan 3
  6. Sophie’s Choice – Jan 10
  7. Bigger vs Better – Jan 17
Additional articles will be released weekly, we hope you will read, share, and comment on them. Tell me what you think, and how you might apply some of these concepts and solutions to your business.

The first article discusses The Black Box, the problem of information obscurity. Read Analysis Paralysis - The Black Box

Friday, June 09, 2017

Gotcha #7 - AppDynamics and the Mysterious Case of the Vanishing Cookie

Not much of a mystery today in this article (the answer is alluded to in the title) but the process of identifying the problem, discovering why it was a problem, and then fixing it was quite a challenge.

Today's Gotcha is about Rational Performance Tester (v8.5.1.2 for anyone interested) and a vexing problem with successful test execution.

The problem originally arose when we discovered that our tests weren't always succeeding. After executing a schedule we would consistently have a large number of pages that wouldn't have 100% success status codes (located on the Server Health Detail view). There would be a few with 100% success rate, but consistently nearly every page was hovering between 94 and 98%. In some larger tests this would drop further, into the 80's or high 70's, but even a simple low volume test would have most pages at less than 100%.

To get a better handle on why and when these page errors were happening, I added a new counter to the default Page Throughput / Page Hit Rate graph (Add/Remove Performance Counters --> Page Performance Counter... --> Status Code Successes --> Percent Page Status Code Success [for Interval]).

Suddenly we could see this wavering line appear on the graph that would start off at 100%, dip sharply at the beginning of the test, before returning back up near 100% and stay fluctuating in the high 90% range.

Baffling when the very same test scripts in the past against the same application would run at 100% without trouble. Doubly-baffling when running the script as a standalone would work perfectly fine.

Following the Clues

The first clue came when we decided to rerun one of our test schedules and monitor the Test Execution of a user thread. Since the failures were reasonably consistent across all pages, chances are we might be able to catch it in the act.

After a couple of hours of watching successful page responses, we caught one. Right from the beginning of a new test script - a page failure. And then another, and another, and so on until every single page in that script failed in order. And the next script. And the next... but then the fourth script, for no apparent reason, began returning successful responses again.

Digging into the error, the only message we could find was a "Failed substitution ^csrfToken=.*$" message followed by a cascade of 500 - Server Error responses. The csrfToken appears in the HTTP Response header as a "Set-Cookie" value from the server (you can find an explanation of its purpose here). And for some reason, it wasn't being found.

Except... inspecting the response of that very first page - the csrfToken was right where it should be. Further digging into the application logs showed the same thing - on occasion our test would be sending an invalid csrfToken - the recorded token - which happens when the substitution couldn't be made.

But it was right there in the Response Header - right where we expected it to be. Except, not quite...

Smoking Gun

It looked like it was right where it was supposed to be - in among a half-dozen other cookies being set by the server. But a careful comparison with the original recording showed that it was 1 line down. There was a NEW Set-Cookie value that was inserted in the list just ahead of the csrfToken.

Inspecting and comparing successful test executions with failed ones showed that this new mysterious cookie only appeared in the failed tests, and wasn't to be found in the successful ones.

The server was randomly inserting a new cookie in its response... some of the time. And it was enough, by shifting the order of the Set-Cookie headers for RPT fail when trying to identify the csrfToken.

The culprit was a cookie called ADRUM_BTs and it looks like the following:
Set-Cookie: ADRUM_BTs="R:0|s:f"; Version=1; Max-Age=30; Expires=...date...; Path=/; Secure

There was no consistency in when or where it would appear. It would show up for a script execution or three, then disappear once more.

Solution

It turns out that we weren't the only ones to run the Mysterious Case of the Vanishing Cookie - other people had identified ADRUM_BTs as playing havoc with their scripting efforts.

The cookie in question belongs to AppDynamics End User Monitoring javascript package, a tool that can be used to monitor user behaviour and web application performance from the user's perspective. It was a new feature in the AppDynamics package that had been turned on in our Performance Testing environment recently to try and improve our measurement capabilities.

In the end, there was no way to remove this new cookie or adjust the system to consistently distribute it. In order to get our Performance Testing back up and running we had to remove all End-user Monitoring components - and suddenly our vanishing cookie was gone for the last time.

Saturday, March 25, 2017

Go Fish Fitness - Getting Kids Moving

My wife and I are parents of 4 (ages 8, 5, 2, and 6 months) and she also runs a home daycare. On any given day we spend time with 10 different kids in our home (though not all at the same time!). We also live in Canada, in a city that has famously been compared unfavourably to the surface of Mars. As a result, we often deal with 10 different kids who have been cooped up inside for long stretches of time due to cold, snow, ice, wind, rain, and general all-around outdoor unpleasantness.

If you’ve been there, you probably know that a group of children stuck inside = energy. A lot of energy. Sometimes destructive energy. They get on each other’s nerves, they fight, they rampage, and they often find it difficult to concentrate. They need to get out and run around, but spending 5 minutes freezing their fingers and faces and they want to come right back in.

So we decided to try something. We started making games for the kids, using rules that they were familiar with as a base (Go Fish – for example) and added in an exercise component. We took a normal deck of playing cards and assigned short exercises to each number, and every time a match was made they had to do the associated exercise.
And then to appeal to their competitive spirit we modified the rules, so that when a match was made everyone ELSE had to do the exercise. Suddenly we had a group of laughing, playing, goofy, jumping around kids who were reveling in the game and making their friends and sibling do the work – and having just as much fun doing it when someone else made a match.

After 15 minutes of playing, the kids went from destructive to constructive. They still had plenty of energy – a short bout of concentrated effort certainly isn’t enough to tire them – but it was enough to take the edge off the irritable frustration that had set in by being stuck inside. They went from angry to happy to play, or craft, or sit and colour. And as a parent I can tell you that the only blessing greater than naptime, is a horde of children happily engaged in their own independent activity.

If you have kids, you can do this too very easily. It’s as simple as a spare deck of cards and a sharpie – write an exercise on each card (the same numbers have the same exercises) and play Go Fish. When a match is made, everyone else must do the exercise a number of times equal to the number on the card. (For example, 10 Jumping Jacks, or 4 Sit-ups).

In the interests of making this game accessible and more interesting for kids, we’ve been working with an artist (Fredrik Skarstedt) to create beautiful, colourful cards that we are currently trying to kickstart a print-run for. If this is something of interest to you, come check it out at (www.tricorngames.com/kickstarter) which ends April 6th, 2017.

Tuesday, January 10, 2017

Gotcha #6 - Sometimes Naive Caching is Worse than None

There is a popular proverb about good intentions and the road to hell that is well known, but an alternate version of that proverb is phrased as "Hell is full of good meanings, but Heaven is full of good works". Unfortunately even good works can lead down the wrong path when they are undertaken with insufficient consideration for their impact.

This post is about one such work - about the implementation of a caching strategy on a large platform that is widely used across the industry. The work itself is good, smart, and done with significant forethought. However under certain conditions, the choices made ended up creating a system worse than if nothing had been done at all. This post explores the choices, circumstances, and effect that implementing an intelligent - but naive - caching system had on one particular project and why the result ended up being worse than if it had never been.

The names of all organizations, people, and software involved have been withheld.

6 Days to Go-Live

A war room had been convened. The production deployment of a new Public Access System (PAS) had gone smoothly over the weekend and everything was prepared to turn the switch and make it accessible in less than a week. The public information campaign had already been underway for some time, advertising the date, and getting the word out that this new offering was forthcoming. However, validation of the deployment had hit a snag - one member of the QA team had noticed something wrong.


At a critical step while making a new purchase on the PAS, the system would appear to pause. After a long delay (45s) it would return with a technical error. Repeating this process several times in a row would produce the same error across multiple sessions, across multiple machines. And then it would go away and everything would work smoothly again.

Until it happened again about an hour later.

And again an hour after that.

And then it went away. Combinations of testing, several people trying to test it in a variety of ways, and using precisely the same data - or different data - it couldn't be reproduced.

Until the next morning, when the problem showed up anew and again the following hour, before disappearing once more.

So began an urgent search to understand the problem began, testing the system, combing the logs, reviewing all the code tracing and analytic tools at our disposal to isolate and resolve the problem - in production.

Underlying this effort was the question - why wasn't this problem seen in any other environment? Through the myriads of Dev and QA environments, through multiple test cycles and performance testing, this pattern of problems had never been encountered before. At times a similar issue would be seen in isolated circumstances immediately following the restart of an environment, but once it was initialized everything was good.

So why was it happening in production, and nowhere else?

Architecture

The PAS is a clustered three-tier system using RESTful services to communicate between the web server and the Back-end Application (BEA). The BEA contains all the business code required to verify, validate, and persist purchase information.


The PAS cluster contains 2 nodes, and the BEA cluster contains 8, separated into two group of 4 - one group dedicated to the PAS and the other for direct Intranet access. As a true RESTful interface, no session information is tracked between requests to the BEA cluster. The load balancer provides a true round-robin.

When the system is active, most of the processing load takes place on the BEA cluster, the PAS operates as little more than a view rendering layer. When a page request comes in to the PAS, it opens a connection to one of the BEA nodes - passes along the request - and waits for a response. In the case where the BEA node takes an abnormally long time, or if there is a failure and no response is generated - the connection has a 45s timeout. If it takes longer than 45s, the PAS would close the connection and display a technical error message encouraging the customer to call their local company representative to complete the purchase.

The Trail of Evidence
When the problem was first raised, there was a great deal of speculation as to the possible cause. Database issues, connection issues, misconfiguration, load balancer issues - all possible sources of this technical error, but all things that would need to be verified and eliminated.

There were a number of observations made about the system that were unusual or worth investigating - including hung database threads and the presence of a query in the AWR (query performance statistics) report that was known to be problematic in other environments. But in hindsight there was only one that would prove to be important to the actual cause: the problem only happened in the morning when full-time employees arrived for work and began using the BEA system directly via the Intranet.

Now the Intranet BEA nodes are physically separate from the ones used by the PAS, but they do share a database. The problem only occurred during the morning hours when load on the BEA nodes and the database were at their highest. Not high enough to cause a bottleneck or result in performance problems - but not insignificant either. More on this later.

The most important piece of information came from our enterprise performance monitoring tool that was installed on all production servers. By drilling down, identifying, and isolating a single request that failed we could examine the performance of the BEA code for that single request.

And what we discovered was a function call that took 24s that involved retrieving a large but critical piece of reference data from the database, and storing it in the application cache. By itself, not enough to cause a timeout and result in a technical error - but in a confluence of circumstances this piece of reference data was then being used for a large and complex set of calculations that took ~20s to complete and in this particular instance was just barely slow enough to cross the 45s timeout threshold and cause the technical error to be displayed. 

Now this isn't unusual - the median time for this particular load-and-store operation was about 15-18s, and once it was complete the data would be cached and any future accesses would take 1/10th of a second or less. But in the situation where it did have to retrieve the data from the database while the db was under significant load caused it to slow just enough to trigger the problem.

But why was it happening at all? Why wasn't it happening elsewhere? And why wasn't it discovered during Performance Testing.

Unexpected Caching

The answer came in a conference call to the vendor. The cache on the BEA system operated as follows:

  1. Objects in the cache are marked as stale at intervals of 15 minutes if they have not been accessed during that timeframe.
  2. If an object was already marked as stale when the interval arrived, it would be evicted from the cache.
  3. Every 4th interval (once per hour) all objects in the cache would be evicted regardless of their state.

This cache interval was configurable to a maximum of 30 minute intervals, extending the hourly global eviction from 1 hour to 2 hours - but no further. This means that every hour all reference data would be purged from the BEA system's memory and need to be reloaded the next time it was accessed... on each node.

The Core Problem

In order for the problem to occur, the following had to happen:

  1. The BEA's cache was empty on the nodes that were used by the PAS.
  2. The other Intranet BEA nodes had to be actively used by a large number of concurrent users to put sufficient load on the database to cause a retrieval delay for the large amount of reference data.
  3. The PAS had to be inactive, with only 1 or 2 users online performing a new purchase. Other operations would cause the reference data to be loaded but not perform the complex calculations that would cause the response delay to exceed 45s.

An unlikely scenario it seems, right?

Except...

  1. The BEA cache would be emptied on the hour, every hour.
  2. The Intranet BEA nodes were being used by employees for their normal job, and would be heavily used every weekday for several hours during the morning.
  3. The PAS was a limited-scope rollout, the only functions that it performed were New Purchase, and Continue a Saved Purchase.
  4. The PAS was so new, that the initial expected load was only a handful of users per day. So the likelihood of having only 1-2 users performing a new purchase was very high.

These circumstances meant that it was very likely that any user of the system would run into the situation where all three conditions were met and cause their purchase attempt to fail.

This problem was further compounded by the round-robin load balancer, and the fact that the reference data needed to be loaded on each node separately. This means that not only was a user likely to encounter the technical error message, but if they attempted to retry their purchase their next page request would be directed to a different BEA node whose cache was still empty resulting in the same error message again.

The expected result is that for a majority of potential customers, each would need to retry their purchase five times before successfully completing it.

Why Wasn't This Caught?

The simple answer is the other environments were not busy enough. Dev, QA, Staging... all of these environments did not have sufficient database usage to cause enough delay to cross the 45s delay threshold. In addition, these environments typically were not configured in the dual-cluster architecture of production, so any activity directly on a BEA node would cause the reference data to be loaded into cache. The chances of a PAS new purchase occurring with an active database were essentially non-existent.

The exception was the Performance Testing environment which did have a fully configured production system, and sufficient database traffic during a test to cause the problem. The reason it wasn't discovered was that the PAS traffic was too high. Even a half-dozen simultaneous users was sufficient to cache the reference data across all the BEA nodes - and even if the error was observed near the beginning of the test once or twice, a few minor functional errors are not unexpected during a performance test and the absence of reoccurence over the next hour would be simply dismissed as an anomaly.

As soon as the circumstances of the problem were discovered, it became a simple matter to intentionally reproduce in Performance Test by adding load to the Intranet BEA nodes and manually attempting to test a new purchase.

Why Did This Happen?

This problem is caused directly by the implementation of a naive caching framework on the BEA system. The purpose behind clearing the cache regularly would be to ensure that reference data (if updated) could only be stale for a certain amount of time before being refreshed. The assumption was that the cache could be cleared every hour without causing a problem, which ended up not being the case. The BEA system had no facility with which to preload reference data, no functionality allowing it to be refreshed periodically except through eviction and reload on-demand, and no ability to persist reference data in a long-term no-expiry cache.

The reason this was more than just a normal problem, is that by implementing a limited cache the system was successfully able to mask the existence of the problem from developers, qa, and performance testing. The naive caching strategy allowed it to work well under load most of the time, and only appear as a problem in very specific circumstances.

Had there been no cache on the BEA system, this problem would have become abundantly clear in performance testing by resulting in terrible performance for that operation and also causing the error rate to approach 100%. But by masking the issue it managed to survive until mere days before go-live when it was discovered entirely by accident.

The Solution

The permanent solution will be to modify the BEA system to build a more sensible multi-use caching strategy with the ability to preload and periodically refresh reference data independent of a user request. Temporarily it has been resolved with an automated process that makes an appropriate service request to each BEA node every minute that triggers the reference data reload if it has been evicted in an attempt to complete that reload before a user encounters it.

Wednesday, August 17, 2016

Tricorn Games - Flipped Off!

I am excited to announce that I have embarked upon a new venture - Tricorn Games. Under this banner we will be developing and publishing tabletop and card games, with potential expansion into the realm of mobile and computer games.

Flipped Off!, our first product is currently in the final stages of development and playtesting. Flipped Off is a tactical card game where you play a plotting Mastermind aiming to defeat your rivals and seize control of the city for yourself. You must manage your Minions - the Pirates, Ninjas, and Robots that do your bidding, play actions that can improve your situation or wreak havoc with your enemies, and use your Minions to launch attacks and hope that your rivals can’t turn the cascade of results to their own advantage.


We are currently recruiting playtesters, if you would like an early look at this game and would like to help us refine it and have input into the final result - please sign up here and join us! Playtesters will receive a high-quality printable PDF of all the game components and instructions, access to the playtest forum, and active participants will receive public credit for their contributions when the final release has been completed.

In addition to Flipped Off!, we have several additional projects under development which will be announced when they are ready for release.

Remember - Play more games!

Wednesday, May 25, 2016

The Tragically Hip - Gord Downie

20 years ago when I was in my early-teens I took a trip across the country by myself. Looking back it doesn't seem like much - I flew from Winnipeg to Edmonton via Saskatoon, a 3-4 hour journey with layovers, but at the time it was a huge step towards independence for me. I was going to Edmonton to spend a month with my cousins during the summer. In truth, I was dropped off at one gate, shepherded by a flight attendant who was there to help underage passengers flying alone, and picked up by family on the other end. But for a kid who had never flown before, to do so alone when he was perfectly happy wiling away the hours on a computer screen in the basement, it felt like a huge, scary undertaking.

It was freedom, and it changed my life, though it took me another five years to realize it.

The flight was uneventful. Scary, thrilling, strange in the way that is common to airplanes and amusement rides. Funny how I became a fan of the former, and you couldn't pay me enough money to tolerate the latter. I wasn't the only unaccompanied minor on the plane, there was another kid seated with me as well who was a couple of years younger and it was his first flight too.

I guess I was visibly nervous, I was a shy kid to start with - not much for talking - and I expect I was probably white as a sheet, staring out the window at the tarmac as the rest of the plane boarded. As the plane began making its way to the takeoff strip, shuddering, pinging, whirring - all things unfamiliar to a novice traveler - a passenger in the row ahead of me turned to talk to us. I don't recall what he asked us, but I told him my name and that it was my first time flying, and we talked briefly in the way that strangers do while the plane was getting ready for takeoff.

As I said, the flight was uneventful for anyone who knew what to expect. Once we were in the air and on our way to Saskatoon, the nice guy in the row ahead of us asked us if we could give him a hand. He and his buddy were doing a crossword puzzle from the morning paper. I can't say that either of them were terribly adept at it, but I was a kid. I don't think I helped worth beans, but it was fun. My fellow underage passenger wasn't interested, but I remember poking my head over the top of the guy's seat and spent the better part of an hour working the puzzle with the two of them.

Before I knew it, we were descending into Saskatoon. At the gate, the two guys said goodbye and left with some other friends of theirs who were also on the flight, while I stayed aboard for the next leg of the journey to Edmonton.

After everyone who was getting off had done so, the flight attendant came back to check on us before more passengers got on. I gather she was a fan - she came over and asked us "Do you know who that was? That was the Tragically Hip!".

I was a kid, I didn't have any bloody idea who the Tragically Hip were. I had heard the name before, but I couldn't have named a single song they played. I was more amazed at my uncle's exclamation when I related the story to him that evening. He knew who The Hip were.

Fast-forward five years, I am 17 years old, just about to turn 18, sitting in my dorm room in Waterloo, Ontario - 2,000km from my home and family. I had just embarked upon the biggest, most exciting, most frightening journey of independence in my life since that flight to Edmonton... and I was feeling it pretty badly. That night, and more than a few nights after I would put on my headphones and turn on my favorite playlist, comforted by the familiar strains of songs I had listened to a thousand times before. Songs that spoke to me in some way, songs that sounded like home. I would fall asleep listening to Great Big Sea and The Tragically Hip, whose album I would never have picked up had it not been for an enthusiastic flight attendant.

This post was prompted by the news that Gord Downie of The Tragically Hip has cancer, treatable but terminal. My father-in-law was killed by the disease less than a year ago, so I can relate to some of the experiences his family is going through today. So I wanted to post this, my own personal experience with them.

So for Ahead by a Century, Membership, Thompson Girl, My Music at Work, and most importantly... Courage, thank you.

Monday, March 21, 2016

Gotcha #5 - Network Performance, CSS, and HTML5

Today's article comes courtesy of understanding your customer's environment, and that emphasizing style over substance can break the bank.

Our story starts with an urgent request for assistance from a system administrator, a minor application update has resulted in a nearly five-fold increase in total network traffic at a remote office. On Monday morning, when the morning shift arrived network traffic began to spike. It grew, and grew, far beyond normal traffic levels for the office and stayed there, night and day, until the last shift signed off on Friday evening.


Think about this for a moment.

The application's network traffic did not increase five-fold. The entire office's network traffic consumption increased from ~2Mbps (24-hour average) to nearly 9Mbps (24-hour average) with peaks topping out at 10Mbps.

The first stage is always denial.

How could a minor update to a server-based web application that mostly consisted of a couple minor bug fixes, one new summary screen, and some UI tweaks be the problem? It must be something else, there isn't anything new or unusual in the application update.

Well...

Step 1: Isolating the Problem
Easy enough to do, by using more detailed reports we could see the initial spike in unusual network activity began at 10am on the Friday before, the same time as the outage window when the application update was deployed.

Also, there were no other maintenance activities ongoing at that time, no file transfers, and no other system updates scheduled or otherwise.

Hmm...

Step 2: Reproducing the Issue
To confirm, we conducted a test where all instances of the application on every workstation on the site was closed, and by so doing network traffic returned to its normal (low) stable state.

One by one, each workstation re-loaded the application and by time the last workstation was reconnected the network traffic was back at its five-fold peak. It was during this process of re-loading that the system administrator noticed something unusual. A new UI feature had been added to some screens, when a specific piece of data was in a warning state - the text box would flash orange. And every time a new screen loaded that happened to display one of these flashing orange boxes, network traffic would spike sharply.

In the end, the system administrator noticed 10 out of more than 100 workstations happened to be displaying this flashing orange box. Returning to shut down just these 10 flashing displays suddenly dropped network traffic back to normal once more. When they were re-loaded, network traffic would spike once more.

Step 3: Cause and Solution
So how can a simple CSS and HTML5 flashing text box on 10 screen possibly start pushing 4 times the total network traffic of an office of more than 100? The technique to highlight a text box had been used elsewhere in the application already, and the style control was rendered entirely in-browser with no additional server requests being made.

How can a box no larger than 400px by 300px with a lovely fade-in/fade-out HTML5 animation possibly consume 800Kbps per screen?

The Epiphany

Animated. For the first time in this application, the developer (to satisfy a requested requirement) used a simple animation cycle to flash the control orange on a 4-second cycle. It was a lovely effect, understated, but unmistakable and was easily visible when displayed on a large screen from across the room.

What wasn't clear however, was that each workstation did not use a browser to view the application. Instead, each workstation used a Remote Desktop (RDP) session to a centralized (offsite) server which then connected to the application in a browser window.

Instead of being rendered in a local browser session and consuming no network resources at all, the beautifully animated flashing textbox was being rendered and streamed as uncompressed full-motion video over the network to the site office.

10 workstations streaming uncompressed video for 24-hours a day, 5 days a week.

Step 4: Resolution
In the end the problem was easy to solve. Rip out the animation, and using a simple steady-state orange highlight to communicate the information.

But it was an important lesson. You must be aware of how your customer is using the tools that you build, and how the simplest of design choices can cause a major impact under the wrong circumstances.

Tuesday, January 19, 2016

Research Study: Memory Test

Contest!

Anyone who signs in with an email address and completes the test before Feb 28 will be entered into a drawing for one of the top 2015/2016 indie games from Steam or an equal value Amazon book order.

Participate Here!


I'm conducting a study on memory and the ability for people to memorize short sequences of numbers. In order to do this I've built a small web app to conduct memory tests. It tracks both correct answers and time spent and scores your performance - so speed is better but not at the expense of answering incorrectly.

The purpose of this study is to test your short term memory skills, numeric analysis ability, and speed. The test is divided in 5 levels of 5 questions that increase in difficulty. You may complete them in any order you choose and at any time if you would like to do some now and return later to do the rest, but you must complete them all before the results can be processed.

The test is randomly generated, so you can take it as many times as you'd like to try and do better, and it tracks your history so you can see you best score if you do it more than once. Each question presents you with a small set of numbers to memorize, then asks you to answer a question about the numbers.

It's very simple, and quick to do. Please give it a try, and share it around - compete against your friends!

For SCIENCE!

Tuesday, November 17, 2015

Refugees - Past, Present, and Future

I debated with myself about writing this post. I normally stick to technology, literature, and various constructive activities on my blog, and I avoid commenting on current affairs or political situations. I avoided the Canadian federal election, talking about who I supported and why, among various other noteworthy events.

This post is different. If you want to avoid my thoughts on refugees and their place in Canadian history, then go ahead and stop reading now.

This is from a post that I wrote and shared on Facebook.

Did you know: 21,000 Mennonites came to Canada as refugees between 1923 and 1930. These were German-speaking people from Russia. This was shortly after the Russian revolution deposed and assassinated most of their royal family who were close allies of the west. This was shortly after the most violent and bloody war the world had ever known, where Germans were the enemy. This was a time when Canada only had 10 million people and 21,000 refugees was a much bigger number for the population to support.
Mennonites said they were a religion of peace, they were pacifists, but to many Canadians they were the enemy. Sure some Mennonites already lived here, but those Mennonite had been living here for two generations and more than fifty years already.
But Canada welcomed them anyway, because that is what we do. Canada welcomed my great-grandparents to this country. My family were refugees fleeing war, fleeing persecution, fleeing the Soviet Gulag. They were the enemy in the eyes of many, but they were welcomed anyway.
Many people are questioning the wisdom of allowing 25,000 refugees into our country who come from circumstances my family knows all too well, as do many families in our nation. I ask you, when has welcoming refugees EVER been bad for this country? When have we ever welcomed in the desperate and persecuted and not been made better for it?
I would gladly open my arms to Syrian refugees and tell each and every one of them only one thing. "Welcome home."
In light of the attack on Paris, many people are questioning the wisdom of allowing Syrian refugees into their country, about the possibility of enemies sneaking into the country among them. An observation was also made in response to my post about having never heard of a Mennonite strapping on a suicide vest.

This is how I answer.

I am not calling for scrapping the vetting and selection process that normally takes place for refugees resettling in Canada. I'm not rejecting this: CBC - Syrian Refugee Screening
I am rejecting this: CNN - Syrian Refugee BacklashThe refusal to aid in a humanitarian crisis because of fear of a few. What is known of the attackers in Paris is that it was masterminded by a Belgian with a history of violence, and conducted by two Belgians, three Frenchmen, and one Syrian who registered as having crossed over in Greece, along with other unknowns.
Registered - as in unlikely to have gone through a checkpoint clutching an AK-47 and a suicide vest. The attack in Paris would have happened with or without this one person's participation - and it sounds to me like the French have more to fear from its own natural-born citizens.
You say you have never heard of a Mennonite with a suicide vest, and I agree with you there. But I would counter that I have heard of Mennonites who joined the SS, and entered the gates of the Stutthof concentration camp as guards. The Mennonite - Mennonites and the Holocaust
ISIS may be trying, but they do not yet hold a candle to the mid-century meat grinders that were Germany and Russia.
What is one or two extremists without resources or equipment in the grand scheme of things? We have exported far more Canadian extremists to Afghanistan, Iraq, and Syria over the past fifteen years. I would suggest perhaps that we might concern ourselves more with actions that we ourselves take that create homegrown extremists, people who feel they are desperate, disenfranchised, and have nothing to lose right here.
CBC - Mosque Arson is a Hate CrimeCTV - Ontario Youth UnemploymentCBC - Poverty In Canada
I am the product of refugees being welcomed into Canada. Refugees who were hated, and feared, and demonized for where they were from, for the language they spoke, and for the beliefs that they held. I understand there is fear here, and that to some people it is a very real fear.

Imagine being one of those refugees. Living in a country halfway around the world, a country where you do not speak the language, where you do not share their culture, or the religion of most. A place where people fear and distrust you because they associate you with an enemy. An enemy that kills unexpectedly, attacking with surprise, an enemy that wants to start a war.

Imagine a new war starting, worse than the last one, started by the same people that your new neighbours see you as being part of. A worse war, one more horrible than anyone could imagine, one where atrocities were committed that saw millions of innocent civilians murdered. And you, living in your new home country, refuse to fight.

In World War 2 military casualties on the Eastern Front exceeded 15 million soldiers with another 14 to 17 million civilians killed in a war between my family's ancestral homeland (Germany) and its former adopted homeland (Russia). The fall of one as an enemy of the west led directly into the rise of the other as an enemy of the west.

And all along, my family lived, grew, and prospered in their new land. They made friends, lived in peace, and grew to be an intrinsic part of their new home. Today there are nearly 200,000 of us in this country, and once again a new wave of refugees are fleeing terror, war, and persecution.

We have made the right choice in the past. We must have the courage and the fortitude to make the right choice again. It is frightening, risk, uncertainty, the unknown are frightening things. But it is the right thing to do. It is what we do.

Because this is what Canada is.

Tuesday, October 13, 2015

The Black Art of Performance Requirements

BAWorld Winnipeg (October 7-9, 2015) at the RBC Convention Centre is now over, and I had a wonderful time listening to a full slate of excellent, interesting, informative speakers. I had the opportunity to meet many new people both in the Winnipeg Business Analyst community as well as others who joined us from out of town, and renew acquaintances and friendships with others that I haven't seen in awhile.

My own session, The Black Art of Performance Requirements went very well, I had a great time presenting and I'm glad I could provide something a little bit unique and different.

If you are interested in the slides from my presentation, I have made them available here. Download presentation for The Black Art of Performance Requirements (315kb).

Thursday, August 20, 2015

Timesplice - Inkshares Funding and Nerdist Competition

Timesplice is now open for funding on Inkshares as part of a competition being sponsored by Nerdist. The top 5 funded sci-fi and fantasy books will be published by Inkshares, one of which will also be selected to be added to the official Nerdist book collection.

The complete first chapter is available now on Inkshares (and hasn't even been published on my own site yet - but will be over the next couple of weeks).

If you have never been to Inkshares before - it is a crowd funding site for book publishing. To pledge support for a book it is only $9.99 - with no payment or cost until the book has been completely funded. And if you are new to Inkshares, they will give you a $5.00 credit towards supporting a book - reducing your very first pledge to only $4.99.

If you happen to like what you read, it would make me very happy if you would be willing to support Timesplice. One way or another I will complete this book and make it available to everyone, but if you support it now we might even be able to get it published on actual paper - giving you something to hold in your hands and read which would be amazing!

Monday, August 17, 2015

Timesplice - Chapter 1: September 24th, 2015

I have updated Timesplice adding Chapter 1: September 24th, 2015.

This is the first update to the "Thread" section - and over the next few weeks I will continue to make additions to this section until the first chapter is complete.

Enjoy!

Monday, August 10, 2015

Timesplice - Chapter 1: Experiment 001

Just a quick note, I have updated Timesplice adding Chapter 1: Experiment 001.

This is a bigger update than I will normally be making on a weekly basis, but it makes sense to post it in its entirety for the first chapter.

Each chapter will be broken up into three distinct sections. The Prologue, The Experiment, and the Thread. This section is the Experiment, and next week I will start posting the Thread.

Enjoy!

Friday, August 07, 2015

A New Endeavor - Timesplice : A Novel

I've decided to try my hand at something new, something I've never tried to do before. I'm writing a book.

Now I'm not new to storytelling, or short form writing by any stretch. But most of the writing and storytelling that I've done has been in the context of a game - most often Dungeons & Dragons which I have been running games for nearly 15 years. But what I like about being a GM is not only shaping a story, creating grand plots, but also collaborating with the players and getting new and unexpected ideas from them.

This is a bit different. I have control over the story from the start to end, and I'm also writing it in a non-traditional narrative structure too.

So this is where you come in. The website is at GarretRempel.com and the book is called Timesplice. It is going to be freely available, chapter by chapter, as I write it. Each week (on Monday mornings) I will add new content and sometimes revise/edit existing content. It won't be a full chapter each week, but at very least a new scene. I would also be happy to receive feedback, the more constructive the better! I have most of the story arc in my head already, I've been thinking about and working on this in some capacity for a year, but I am open to new possibilities too. Questions, comments, suggestions, they are all welcome.

I've also published on my new website a short story titled "Confessions of a Drone Pilot". It's one I wrote awhile back, but I figured since I was going to the effort to create a website I might as well publish it too.

Just as an added plug as a thank you, my friend Bill Harris of Dubious Quality has been helping me with editing. He is also the developer of the game (available on steam) Gridiron Solitaire.

Thursday, July 09, 2015

Kids Climbing Play Structure - Building a Climbing Wall and Cargo Net

My wife was looking at play structures to give our three kids something new to do when they were playing in our yard, and hit on the idea of a climbing structure. After looking through a variety of options available online, we found that most were either too large for our small postage-stamp yard or made entirely of plastic which were impossible to store in the winter and priced at $400 and up. Now I am not a carpenter by any stretch. I am a computer programmer by trade and was never particularly inclined towards manual labour, but I concluded that I could probably build something that was well suited to our yard and would serve our kids well.

So I set off with the following list of requirements.
1) It must have two climbing components, a rock wall and a cargo net.
2) It must be sturdy enough to hold 3 children at once.
3) It must have a small footprint.
4) It must be portable and it must be able to collapse or fold for storage during the winter.
5) Total cost of materials must be under $400 CDN and be built using commonly accessible tools (using either what I already had on hand, or could borrow from my father - only tools that I already knew how to use).

Here is the end result:


Footprint: 7.5ft x 4ft
Height: 6ft from ground to top of the wall (6ft 3.75in to highest point)
Folded Dimensions: 7ft x 8in
Total Cost: $468.67 (ok, I didn't succeed here - but it was close!)
Tools Used: Circular saw, jigsaw, hacksaw, electric drill, power sander, various wrenches / drill bits / screw driving bits, hammer, chisel, screwdriver, pliers, metal file, tape measure, carpenter's square.

If you would like to build something similar, below you can find my complete materials list (not including the extras I had left over!), design plans, assembly instructions, and plenty of photos I took during the process. If you do decide to build your own, I would love to hear from you to see how it turned out - please leave a comment below or send me an email.

Materials
Note: I have no connection to Home Depot or any renovation stores - I just shop there. I've included links for everything I bought to their product page at the place I bought them from for your reference.


Qty
Material
Purpose
7
Structure
7
Climbing deck
8
Structure
4
Structure
1
Structure
2
Structure + Climbing Holds
2
Hinge
8
Hinge
2
Hinge
2
Cross brace mounting
2
Cross brace mounting
8
Cross brace mounting
4
Cross brace mounting
4
Cross brace mounting
1
Cross brace
5
Climbing Net Anchors
16
Climbing Net Anchors
1
Rock Wall
1
180ft of 5/8-inch 3-strand twisted polypropylene rope (this was purchased at Rona, but I could not find their product page for it online)
Climbing Net


Design
The basic concept for this build is a simple A-frame with a removable cross brace that allows the two faces of the frame to fold together. An off-center pivot and one face narrower than the other allows it to nest inside it when it is folded and thus letting it fold completely flat.


The structure would consist of two mirrored A-frames as shown above, built from solid cedar 2x6's. The frames would be connected by 2x6 beams so that the 'exterior' legs are on the same face and that the completed structure is 4ft wide and a 1/2" hex bolt at the top center serves as a pivot so that the two halves can close like a scissor.

The Rock Wall face will be decked with 1x6 cedar boards for the climbing holds to be mounted on, while the Cargo Net face will have ropes woven together through eyebolt anchors that have been drilled into the frame.

Instructions
These instructions include some adjustments that I made during the construction process when I noticed and made some changes during the build. You may see some pictures that seem to be out of order because more of the structure has been finished than where you are. This is because I had to go back and add some reinforcement later on to ensure it was structurally sound.

Building the Frame
The legs of the frame are constructed from four 2x6's that are cut identically. Repeat the following for each of the four 2x6 boards.

1) Drill a 3/16-inch pilot hole located 7 ft (84 inches) from one end and 1 inch off-center (3-3/4 inches from one side, 1-3/4 inches from the other).

2) Using a compass (or a piece of string tied to a screw) that is anchored at your pilot hole, mark a 3-3/4 inch radius arc across the short end of the board.

3) Cut along the arc with a jigsaw and round the end of the leg.

4) Enlarge your pilot hole with a 5/8-inch drillbit. This is where the Pivot Bolt will be eventually secured.

5) Mark a diagonal line across the long end of the board from the corner to a point 3-7/16 inches from the end on the same side that has the offset hole.

6) Cut alone the line with a circular saw.


The legs of the frame are complete (for now), the next step is to cut and attach the beams that will form the support structure for each face.

7) Using two 2x6's, mark and cut two lengths that are 45 inches long, and two lengths that are 41-1/2 inches long.

8) Select two legs to use for the larger Rock Wall side of the structure.

9) Mark and mount the two 45 inch beams flush with the leg's Face Edge. One beam will be positioned 4-1/2 inches above the toe, the tip of the bottom edge of the leg. The other beam will be positioned 3-1/2 inches below the Pivot Hole.


10) Attach each beam using two 4-inch wide metal reinforcing angles and 1-inch wood screws.


11) Select two legs to use for the smaller Cargo Net side of the structure.

12) Mark and mount the two 41-1/2 inch beams perpendicular to the leg's Face Edge. One beam will be positioned 6 inches above the toe, the tip of the bottom edge of the leg. The other beam will be positioned 3 inches below the Pivot Hole.


13) Attach each beam using two 4-inch wide metal reinforcing angles and 1-inch wood screws on the bottom side of the beams.


14) Take both parts of the structure and tip them onto their sides. Place them so that you line up the pivot holes and the two structures are back-to-back, the Cargo Net side should fit nicely inside the Rock Wall side.

15) Through each of the pivot holes from the outside-in, thread a 1/2-inch diameter, 4-inch long hex capscrew bolt. Place one washer on the outside, two in between the two pieces of wood, and one on the inside. Use a nylon insert lock nut to hold it in place and tighten firmly.


To complete the base structure the last step is to add reinforcement to the Cargo Net side in order to support the weight of the climbers once the net is mounted to the frame.

16) Secure each beam on the Cargo Net side using two 2-inch by 3-inch metal reinforcing angles and 1-inch wood screws on the top side of the beams. Make sure to position the reinforcing angles so the 2-inch side is vertical against the legs and the 3-inch side is horizontal against the beam.

17) Using the last 2x6, mark and cut two lengths that are 41 inches long. Slide each beam on top of the reinforcing angles you just added and attach each of them with 6 3-inch wood screws up through the beam just below it to laminate them together.


Adding the Cross Brace Mounting
The cross brace is a simple removable metal bar that attaches to the legs of the structure on either side and holds them in place, preventing the structure from sliding open when it is upright. The cross brace is detachable, allowing the structure to be folded up and stored flat.

1) Using a hacksaw, cut the slotted flat metal bar in half at a slight (60-degree) angle. Use a metal file to file down the sharp cut ends of the bar.

2) Stand the structure upright so that it is in its final A-frame position. Measure to ensure the pivot bolt is 6 ft above the ground, and from the toe of the Rock Wall side to the toe of the Rope Net side is 7 ft 6 in. The feet of the structure should rest flush and level on the ground.

3) The outermost unbroken holes in the slotted metal bar are the mounting holes. The next step will be to position them on the structure and mark them so that we can drill holes for the mounting bolts.

4) Position the metal bar so that the angled cut is almost flush with the Rock Wall face and low enough so that the mounting hole on the cut side is about 1-inch from the face edge, and the mounting hole on the other side is about 1-inch from the back edge of the Cargo Net side.

4) Mark the mounting hole positions on the structure and repeat for the other side. Use a 3/8-inch drill bit to drill the four marked positions.

Because the Cargo Net side is designed to fit inside the Rock Wall side, if we simply put the mounting bolts in as-is then the cross brace wouldn't sit flush and true on both sides of the structure - it would have to bend to fit properly. Also, the mounting bolt on the Cargo Net side would interfere and prevent the structure from folding completely closed.

To solve these problems I had to add a block on the Rock Wall side for the cross brace to rest against securely, and I had to counter-sink the bolt on the Cargo Net side.

5) Using a scrap of 2x6 from previous cuts, rip two 1-1/2 inch strips lengthwise along one of your scrap pieces. Cut these strips down  so they are 3-inches long. The grain of the wood must run lengthwise to avoid spitting.

6) Use a 3/8-inch drill bit to drill holes in the center of each 1-1/2x3 inch block.

7) Through each of the brace mounting holes on the Rock Wall side, from the outside-in, thread a 3/8-inch diameter, 4-inch long hex capscrew bolt. Place one washer on the outside prior to threading - you will need a hammer in order to drive the bolt through the hole (it's a tight fit). Once you have the bolt inserted, slide the wooden block that you just made onto the end (again, with a hammer).

8) Once the block is firmly in place, place a washer on the bolt and secure it in place with a 3/8-inch hex nut.


9) On the Cargo Net side, use a small coring drill bit (I used 1-1/4 inch bit) to drill 1/2-inch deep on the outside of the frame where you have already drilled the mounting hole. Use a chisel to clear and clean the center of the core.

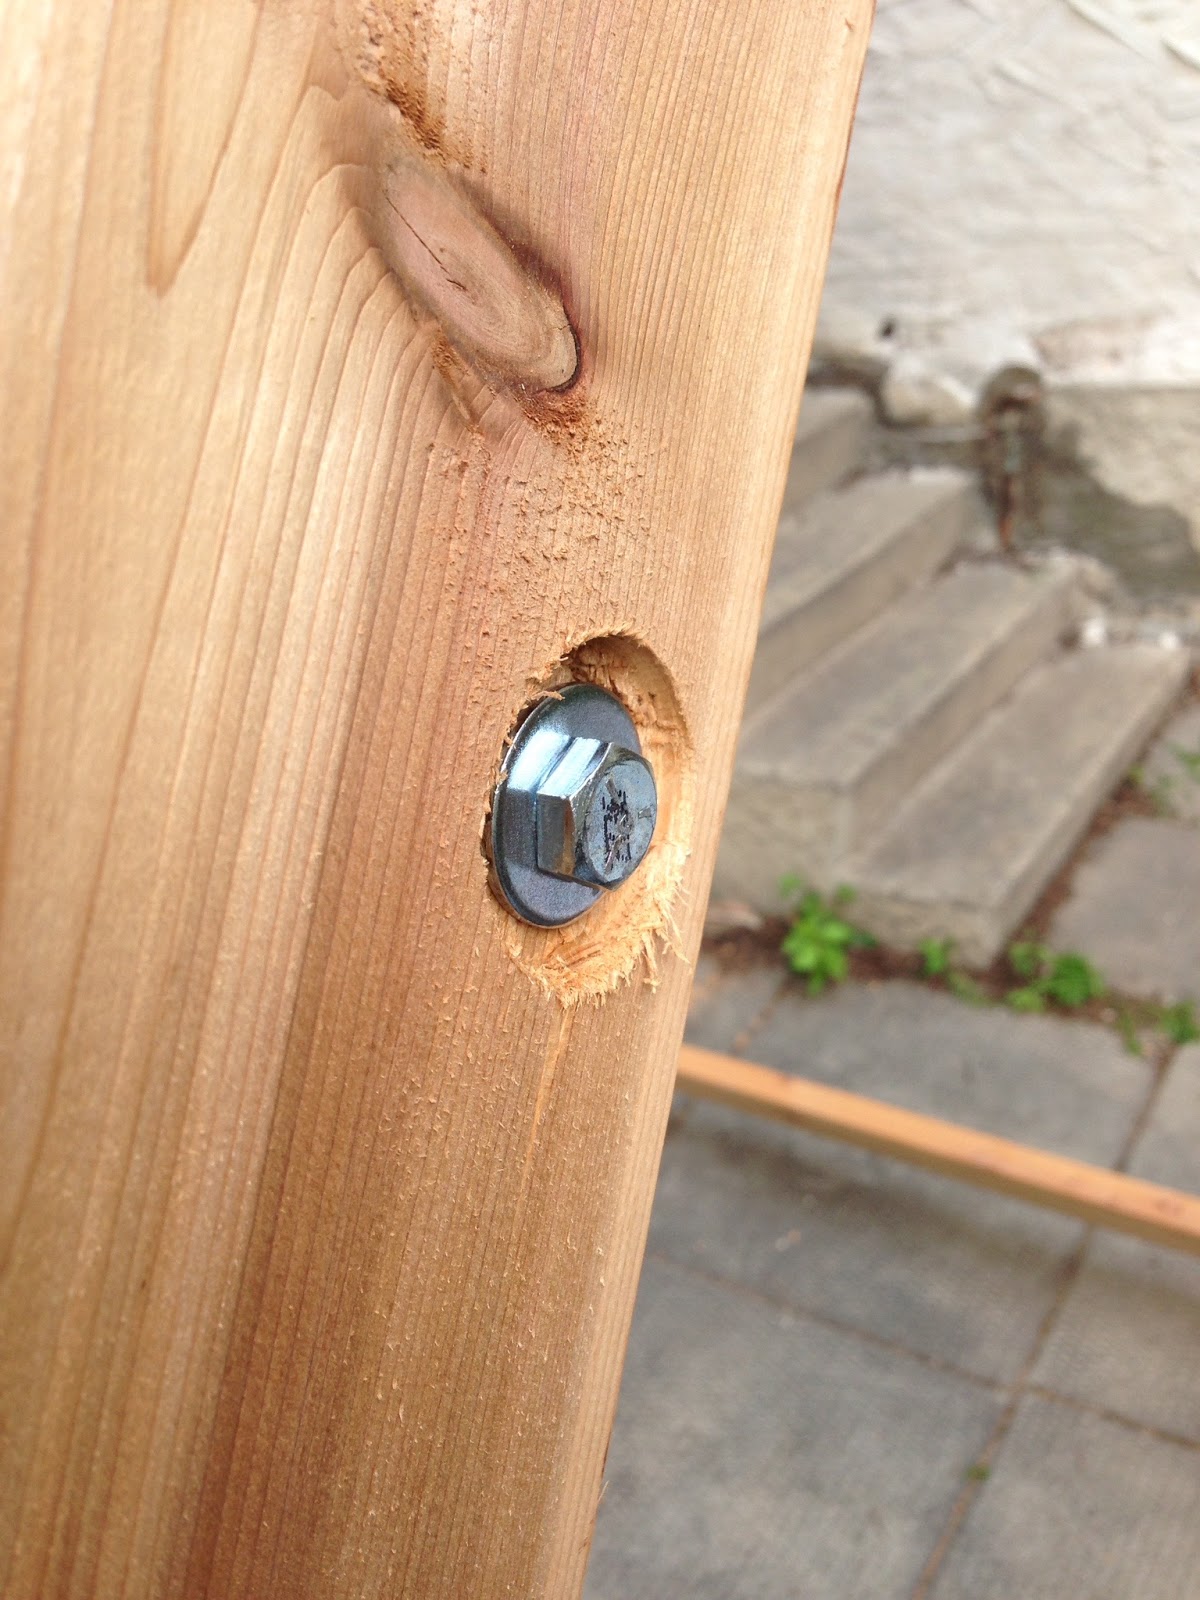
10) Through each of the brace mounting holes on the Cargo Net side, from the outside-in, thread a 3/8-inch diameter, 2-1/2-inch long hex capscrew bolt. Place one washer on the outside prior to threading - you will need a hammer in order to drive the bolt through the hole (it's a tight fit). Place a washer on the bolt and secure it in place with a 3/8-inch hex nut.


11) Thread the cross brace on the mounting bolts and secure with two 3/8-inch steel wingnuts.


The cross bracing is now complete.

Finishing the Rock Wall
To finish the Rock Wall we will need to install the climbing deck and then add the holds!

1) Measure and cut each of your seven 1x6's in half so that you have fourteen 4ft long 1x6 boards.

2) Remove the cross braces from you structure and fold it up, laying it flat on the ground with the Rock Wall side facing up.

3) Align the first of your 1x6 boards so that it is flush with the top of the top support beam on the Rock Wall side and lies across the face. Secure in place using 3-inch wood screws.

4) Position and secure the rest of the 1x6 boards on the face of the Rock Wall side, leaving a small, 1/4-inch gap between them (I used a couple of small screws as spacers to keep it consistent).


5) Arrange the climbing holds on the Rock Wall surface however you like and screw them in place.

A couple notes on how I arranged the holds. I avoided placing any on the bottom or top boards on the wall since they would be wasted there, at the bottom a climber can stand on the ground to reach, and at the top they can grab the top of the wall.

I also substituted a lot of the provided 2-inch screws provided for the installation of the climbing holds with 1-inch wood screws. The reason is that many of the mounting holes in the climbing holds are very shallow, and in a lot of places the 2-inch screws would punch right through the climbing deck - leaving a sharp point on the reverse side that a child could scratch themselves on. So I swapped out close to 2/3rds of the provided screws, and only used the longer ones for mounting holes that had enough rock that they wouldn't sink right through the deck.


Finishing the Cargo Net
To finish the cargo net and end this project we need to install the rope anchors, weave the net with our ridiculous amount of rope, and tie it off.

1) Along the underside of the upper beam on the Cargo Net side evenly space and mark 5 points 8-1/2 inches apart along the length and 1 inch from the side's face. The beam is 41.5 inches long, so your marks will be at 3-3/4, 12-1/4, 20-3/4, 29-1/4, and 37-3/4.

2) Drill a hole slightly smaller than the threading on your 7/8-inch eyebolt. For the eyebolts I bought, I used a 5/16-inch drillbit and drilled 1-1/2 inches deep leaving enough wood for the screw to bite without splitting the beam.

3) Screw your 7/8-inch eyebolts into the drilled holes and align them so they are flush with the face.


4) Mark 8 points down each leg, 1-inch from the face, starting 4-1/4-inches from the top beam and then spaced 8-1/2-inches apart. Drill each mark and install your 5/8-inch eyebolts in the same fashion. Align the eyebolts so they are perpendicular to the face this time.

The screw length of the 5/8-inch eyebolts is shorter and thinner than the 7/8-inch eyebolts so make sure you select an appropriate drill bit, and don't drill as far into the leg. I used a 3/16-inch drillbit and only drilled 1/2 to 3/4 of an inch deep.


5) Cut your rope into 10 equal lengths of 18 feet, using a lighter to melt the ends to prevent fraying. If you are left with one rope slightly shorter than the others when you reach the end of the roll that's ok. Set that rope aside and use it for one of the outside edges of the Cargo Net - the side strands have fewer knots and don't need to be quite as long.

6) Group your ropes into 5 pairs, tie a secure knot at one end and thread the two long ends through one of the five eyebolts at the top of the frame from the back.

7) Here I will cheat. I will send you a link to how to tie a cargo net. My wife did the knotting (and did a fantastic job of it too!) because I can't tie knots to save my life.

Ignore their advice for rope length or net size - only worry about the knot structure and pattern. This net is made using a 6-inch grid and the eyebolts are spaced properly for that size.

How to Make Rope Climbing Nets

Every other row of knots, the outside strands remain loose. Thread them through the eyebolts to anchor them.


8) When you reach the bottom, drill five 1-inch holes spaced in the same way as the eyebolts at the top of the frame.

9) Tie one last row of knots, then thread each pair of ropes through the holes and tie them off on the other side. ***

***Caveat - I didn't get to do this. I used 150ft of rope, not 180ft - and we came up a little short. I had to improvise using a heavy metal plate and screwing the ropes into place on the underside of the frame. It was my plan to tie them off, but it didn't quite work out.

And you are done! I hope you have fun with these instructions, and if you give it a try please let me know how it works for you!